
My daughter has been asking me to make her one of these for a while, so I thought I'd figure it out and then I can make some for the school carnival stall from old clothes!
I used old clothes for this one, but you could use any fabric. For the adjustable strap, I used plastic parts from old bag straps that I've saved over the years. I have quite a collection!

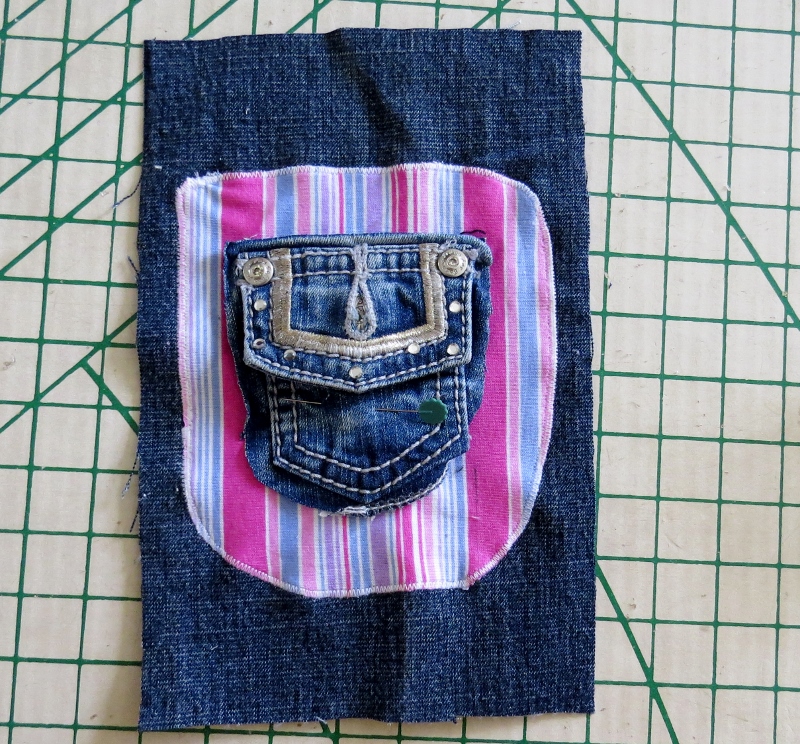
So for this water bottle carrier I used some old jeans for the outer, plus a pretty jeans pocket, an old sports shirt for the padded lining, and some co-ordinating fabric from my stash for the inside and strap.

Here's how to make your own water bottle carrier.
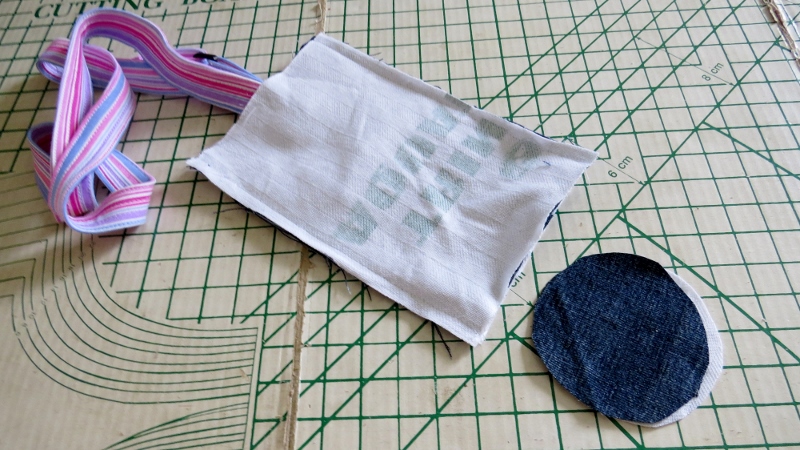
First cut from each of your outer, middle and inner fabrics, 2 rectangles, 22 x 14 cm (8.5 x 5.5") and one circle of each fabric, 9 cm (3.5") in diameter. Then for the strap you will need one strip
1m 10 x 10 cm (43 x 4") and a shorter strap 16 x 10 cm (6.5 x 4").

I also had a small jeans pocket and some co-ordinating fabric for decorating the front of the water carrier, plus a D ring and an adjustable strap piece (as shown in the above picture). You can add any kind of decoration you like - a pocket, an applique, a fabric flower, buttons or simply leave it plain.
For the decoration I simple used an applique stitch on my machine to stitch around the co-ordinating fabric.


Then I did the same with the jeans pocket in the centre of that.

The strap
First take the longer strap piece. Fold the short end over, and the two long sides in to the centre like this:


Then fold the whole thing in half so all the raw edges are hidden.

Now stitch around all 4 edges of this strap - folding all the way down the strip and the other short end in the same way so there are no raw edges showing. Stitch two extra rows of stitching down the inside of the straps for extra strength.

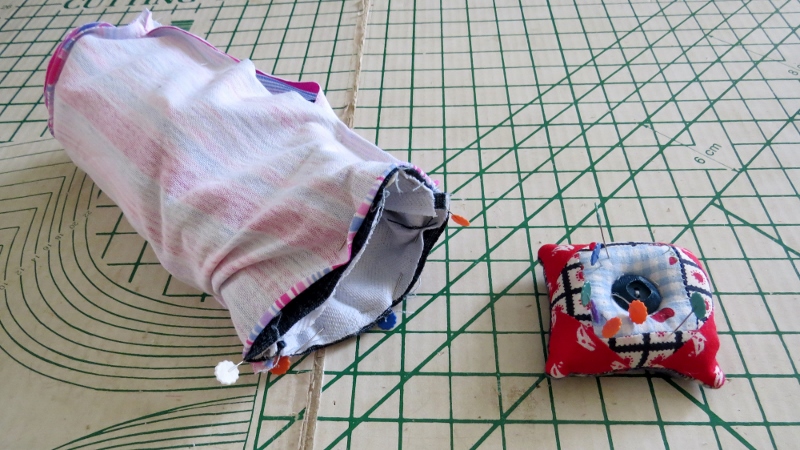
Repeat this with the shorter strap piece. So now you should have this:

Take the shorter strap and loop it through the D ring, then match up the two ends of the strap and lay it on the top of the front rectangle of outer fabric about 5 cm (2") down from the top edge.


Pin and stitch into place by stitching a small rectangle at the base of the strap (where the pin is in the picture).
Now for the longer strap. Thread one end through the adjustable strap piece like this:

Fold the short end back and pin to the longer end. Stitch into place with a rectangle of stitching near the end of the strap.

Then loop the other end of the long strap through the D ring, then back up through the adjustable strap piece as shown in the following picture.

Lay the strap flat and ensure there are no twists before pinning the other end to the other outer rectangle piece as you did with the other piece. Stitch into place with a rectangle of stitching.

Main carrier body
Now you are ready to put your bottle carrier together.
Place the two outer fabric pieces together, right sides facing.

Then add the inner 'padding' pieces - one on either side of this and pin down the long sides.


Stitch along the sides where you have pinned. Then take the two circles of outer and padding fabric. You will now attach these to the bottom end of your carrier - that is the opposite end to where the straps are attached.
Pin then stitch these two circles around the bottom opening.

Turn right sides out.

The lining
Take your final 2 fabric rectangles - your inner fabric. Pin these right sides together along the long edges, but leave a gap on one side. You will need this to turn the carrier right sides out at the end.

Stitch the sides, then as with your outer piece, pin then stitch the circular base to one end of your inner tube.

Putting it all together
Push your outer piece inside your inner piece - so that you have the right sides of the fabrics facing each other. Make sure the strap is pushed inside too.

Line up the top raw edges of the openings of both parts. Pin and stitch all the way around.

Turn your carrier out through the gap in the lining fabric.

Pin then stitch the opening closed.


Push the lining inside the outer part, then top-stitch around the top opening.


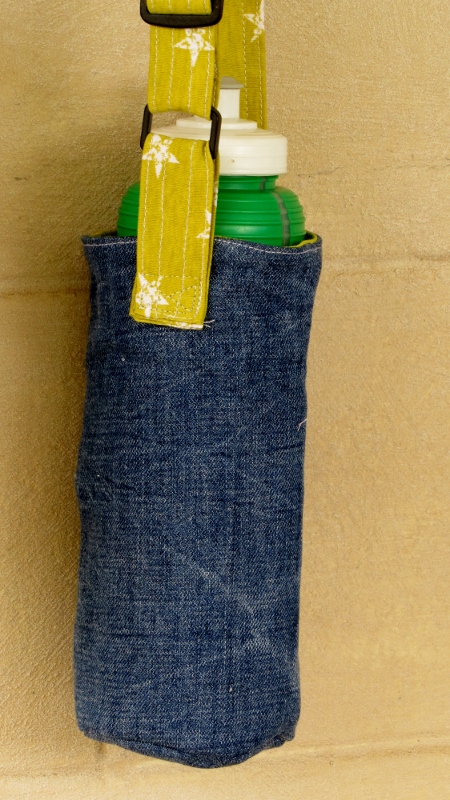
And you're done! One water bottle carrier finished!

Pop a water bottle in and off you go!


I made another plain one too.

Now to make lots more different colours and with different decorations on the front for the school carnival stall!

For the free downloadable PDF version of this tutorial, click here.
To see more Water Bottle Carriers I've now made - go here!
To see what else I've made so far for
the school carnival stall, go here.
And if you enjoyed this tutorial, there are over 100 more sewing tutorials on my free tutorials pages.


I shall be linking this post to many of the fabulous linky parties whose pretty buttons can be found on the bottom of this page and whose direct links can be found on my linky party page.
No comments:
Post a Comment